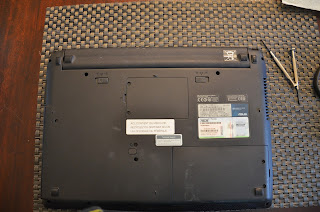
First of all, let's reminisce at why your screen is broken, so you do not do this again. For me, I was on my honeymoon, and my husband put the laptop in our hotel room safe. It seemed to fit and the door closed. Upon retrieval, the screen looked crazy, and the screen plastic bezel was broken in 2 places. We figured the safe's locking mechanism somehow cracked the screen. So it's the safe's fault; or as I remember it: Husband in trouble!
When you are done feeling bad about how it broke, first check if your Asus is under warranty. Asus offered the first year with free accidental breakage warranty. Poured some OJ on the keyboard? No problem.. Break the screen? No problem. Oh wait, I forgot to register my laptop with Asus within the first month of purchase. So not only can they NOT help me, but now I'm registered with them as damaged goods, which voided all other warranties. Stankx Asus. Moving along.
So I googled many screen manufacturers, and it is hard to trust what's out there. I felt really good with the vendor I choose. I chose www.laptopscreen.com. It was super easy. I just clicked on my model number, and chose glossy screen. It came to my house the following day. Their products are OEM and are fully compatible. The packaging was great, double bubble wrapped, and then in a sturdy box, with "fragile" written on it. I can't help but to steal the joke from "A Christmas Story" with Ralphie. "Fra-jillll-ayy...must be Italian".
Ok moving along to the items you need to complete this project:
Item 1) A friend to keep track of all the small bits like screws and screw covers. Don't lose these! Find somebody you trust.
Item 2) Make sure to have an annoying cat handy. We all know how they love projects, or to get into the middle of anything when you are trying to concentrate. This will grow your character.
Item 3) small set of screw drivers
Item 4) paper towel or soft cloth
Item 5) small plastic bread tag if you don't have nails to remove the bezel.
Item 6) Cup of tea
Let's begin....
Step 1) Unplug the laptop and remove the battery.
Step 2) Open the laptop, and remove the screw covers. I carefully used the flat-tip screwdriver to pry off the screw cover stickers. There are 4 on the top of the screen bezel, and 2 on the bottom of the screen bezel. Arrange them in a safe area, guarded by your friend.
Step 3) Remove the 6 screws with Phillips screwdriver. Careful not to strip the screws! Make sure to have good contact before turning. Place the screws next to the corresponding covers which are guarded by your friend.
Step 4) Carefully, pry the screen bezel off. I had to use the plastic bread bag tag. You will hear clicking sounds as you remove the bezel. Also my bezel was broken from the accident, which made it harder to remove.
Step 5) Close the laptop lid and open it again, leaving the screen on the keyboard and the 40-pin connection visible.
Step 6) Remove tape holding the connection to the old screen. Look at the connection, and notice how it goes together. The connector attached to the PC side, slides into the back of the connector on the screen side.
Step 7) Pull off old screen from the 40-pin connector, and discard old screen at a recycling facility if possible. And hug a tree on your way home.
Step 8) Place paper towel on keyboard and new screen face down on the paper towel. I kept all packaging on the new screen until the next step.
Step 9) Slide PC connector into the back of the connector on the new screen. You will hear a click when its in place.
Step 10) Put additional tape on, if necessary, where the old tape was.
Step 11) Open the computer, with the keyboard in the air and the screen piece on a flat surface. Remove plastic protector covering.
Step 12) Locate plastic bezel and screws and screw covers. Hopefully your friend didnt allow the cat to mess up the pile. Unfortunately the cat won. Find all pieces if this happens, and remember the larger screws were on the bottom.
Step 13) Put the bezel back on. Make sure the screen looks ok, and that there is no border showing. You will hear clicks when the bezel is in place.
Step 14) Tighten the screws and put the plastic screw covers back on.
Step 15) Put the battery back in and Voila!!!! Start your system, and give yourself a big pat on the back. You just saved $600 and gained confidence!
Thanks for reading, and *Good Luck!*


